Configuring Tasks
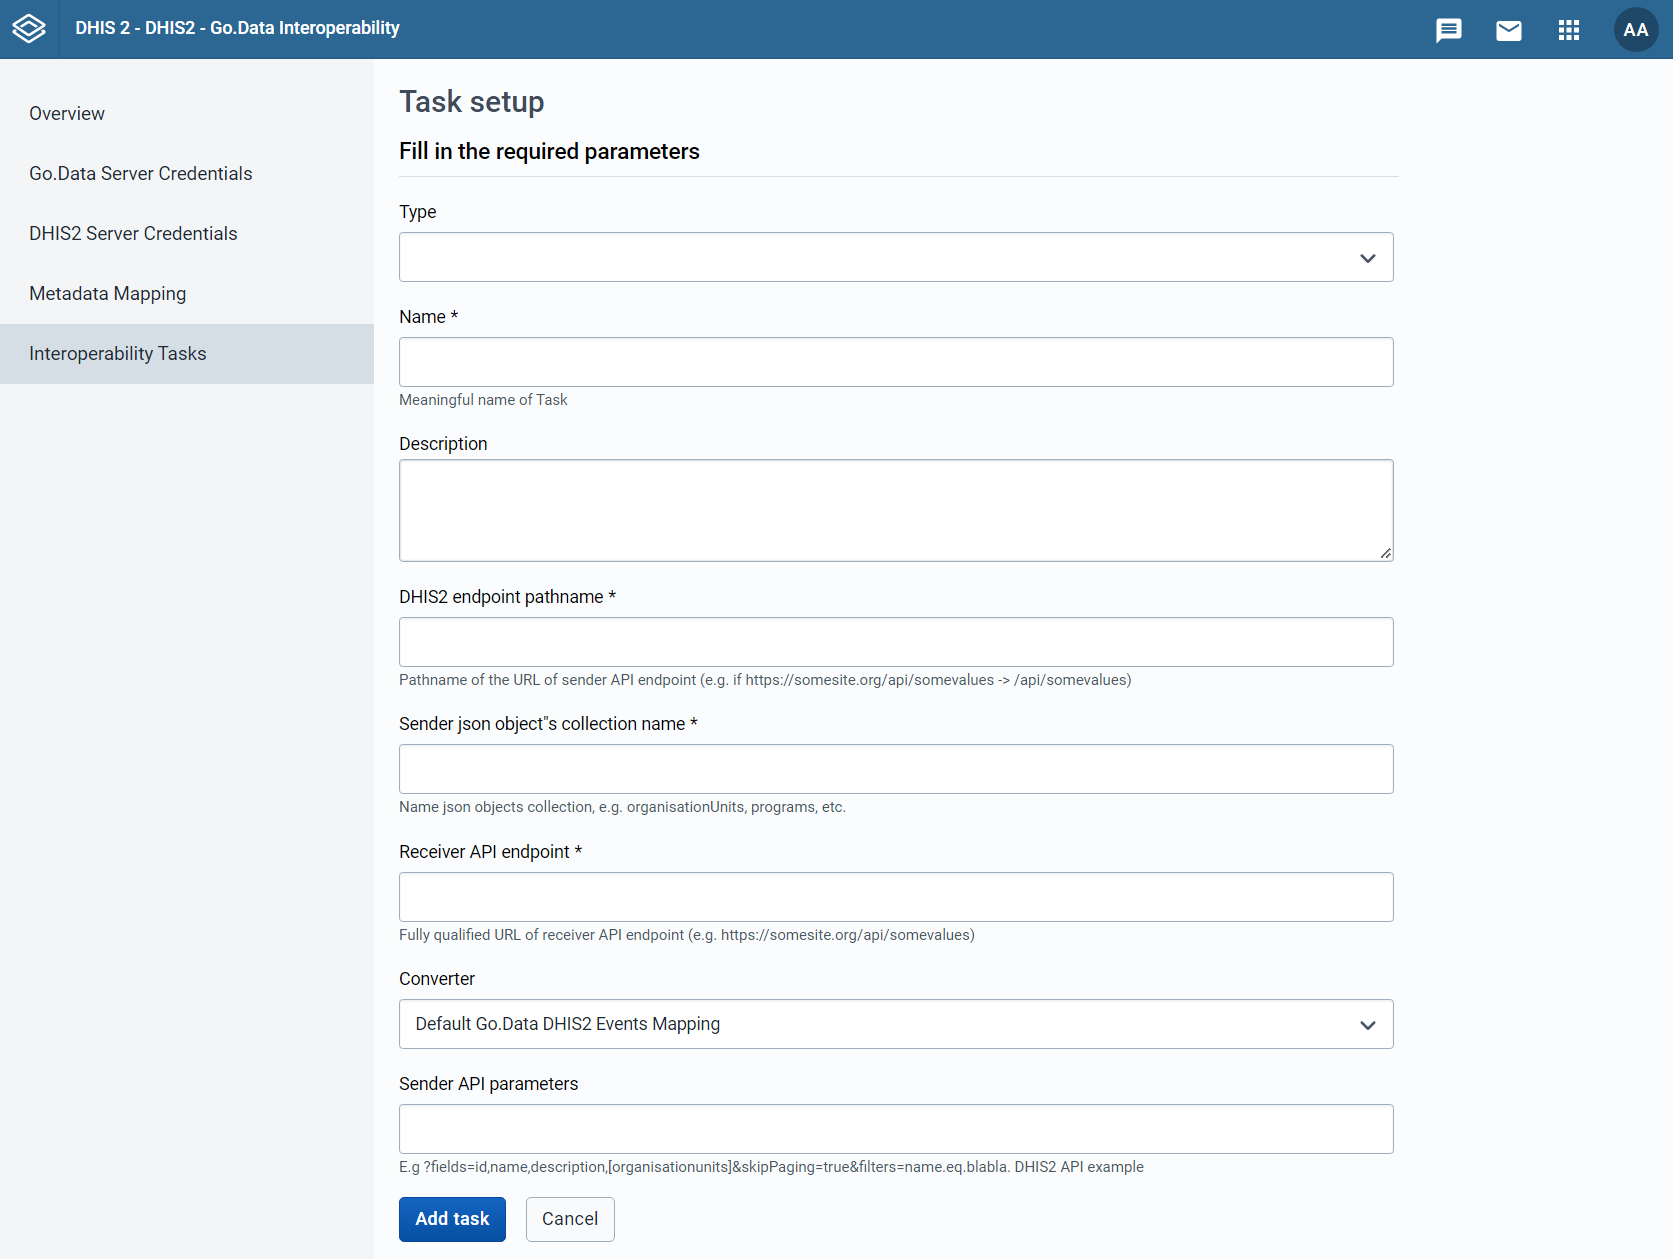
Tasks have a series of fields that need to be filled before running, as can be seen in figure 8. In this section, we will go through how to configure a task.
Type, Name, and Description.
Interoperability Tasks, just like Metadata Mappings, are of a given type. Each Interoperability Task will be associated to a Metadata Mapping, and the types of both need to match. Thus, the first thing we need to set is the type of the task, according to what kind of element we want to share between the two softwares (remember: outbreak, location, case, etc.).
After setting the type, we need to give the task a meaningful name so that it can be easily identified in the Interoperability Task menu. We can also give our task a description for making it more understandable to other users.
DHIS2 Endpoint Pathname and Sender Object Collection Name
The application needs to know where to locate the items we want to migrate, and where to send them. In order to specify the DHIS2 location of the elements we want to transfer, we need to fill the "DHIS2 endpoint pathname" with the path to their location.
API endpoint of the sender instance. Here we need to introduce the link to the path to where the data object we want to draw our data from is located. The available data objects in your DHIS2 instance can be consulted by navigating to "{host}:{port}/dhis/api/resources". The required path and object collection for each of the types of task can be found in table 2. The required value for your given type of task can be copied and pasted into it's respective field in the Interoperability Task settings.
Table 2. DHIS2 endpoint pathnames and Sender object collection names for the different types of task.
Receiver API Endpoint
Similarily as with the DHIS2 endpoint, we also need to specify the pathname of the receiver endpoint (Go.Data). In table 3, the required paths for the different types of task can be found. Those can be copy-pasted in the "Receiver API Endpoint" field of the Interopoerability Task. In the case of Go.Data Case, Contact, and Contact of Contact tasks, please take into account that the pathname will require that you change the "{outbreakId}" part of the field to the outbreakId of the outbreak to which we want to send our cases, contacts, or contacts of contacts. Make sure to also remove the curly brackets: they are there just to illustrate the part that needs to be changed.
Table 3. Receiver endpoint (Go.Data) pathnames for the different types of task. In bold, and in between curly brackets are some placeholders for outbreakId that need to be replaced with the outbreakId of your outbreak of interest. The brackets need to be removed too.
Converter
In the Converter drop-down menu we need to select which of the Metadata Mappings we want to use for this specific Interoperability task.
Sender API parameters
This field requires some query parameters for the query over the sender API. You can find some recommended parameters in table 4. Take into account that if you use the parameters in the table for Cases, Contacts, or Contacts of Contacts tasks, you will need to replace the terms in the curly brackets with the IDs of the following DHIS2 elements:
root_OU_id: The ID for the DHIS2 root Organization Unit.
program_id: The ID for the DHIS2 program from which you want to send the cases or contacts from, be it the cases, contacts, or events program.
program_stage_id: The ID for the DHIS2 events program stage, only in the case of the events Interoperability Task.
These ID's can be found either through navigating the DHIS2 API or by navigating to the the desired element (the root OU, the program, or program stage of interest) through DHIS2's Maintenance app, and inspecting the URL on the browser bar, where the ID will be the 11-letter alphabetic code after the last slash in the URL.
Table 4. Sender API query parameters for the different types of Interoperability Task. In bold, and in between curly brackets are some placeholders that need to be replaced with the correspondent IDs. The brackets need to be removed too.
Saving the Task
When we are finished creating or modifying the task, we can save it by clicking on the "Add task" button. Modifying or renaming a task won't create a duplicate, it will overwrite the modified task. There is currently no way to duplicate tasks. However, if the default Interoperability Tasks created for the DHIS2 COVID19 metadata packages are renamed and saved, a fresh copy of the original default task can be reloaded by clicking on the "Load default config" button again. This allows the user to modify a default task if necessary, save it, and still be able to re-load the default.
Last updated