Selecting the Go.Data and DHIS2 models
Defining the Go.Data model
Before starting to fill the mapping, we need to define a Go.Data model from which we want to create the mapping. The Go.Data model is a JSON document containing the different variables that exist in Go.Data for a given type of element. For example, when we are speaking of a Case, we can find variables such as "dob" (date of birth). The Go.Data model contains all these variables
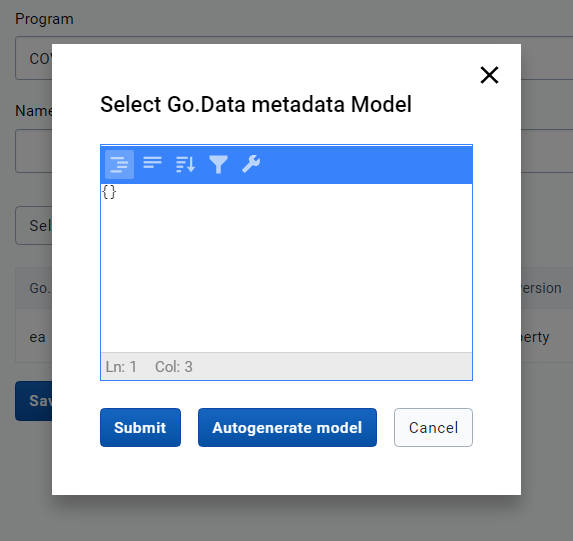
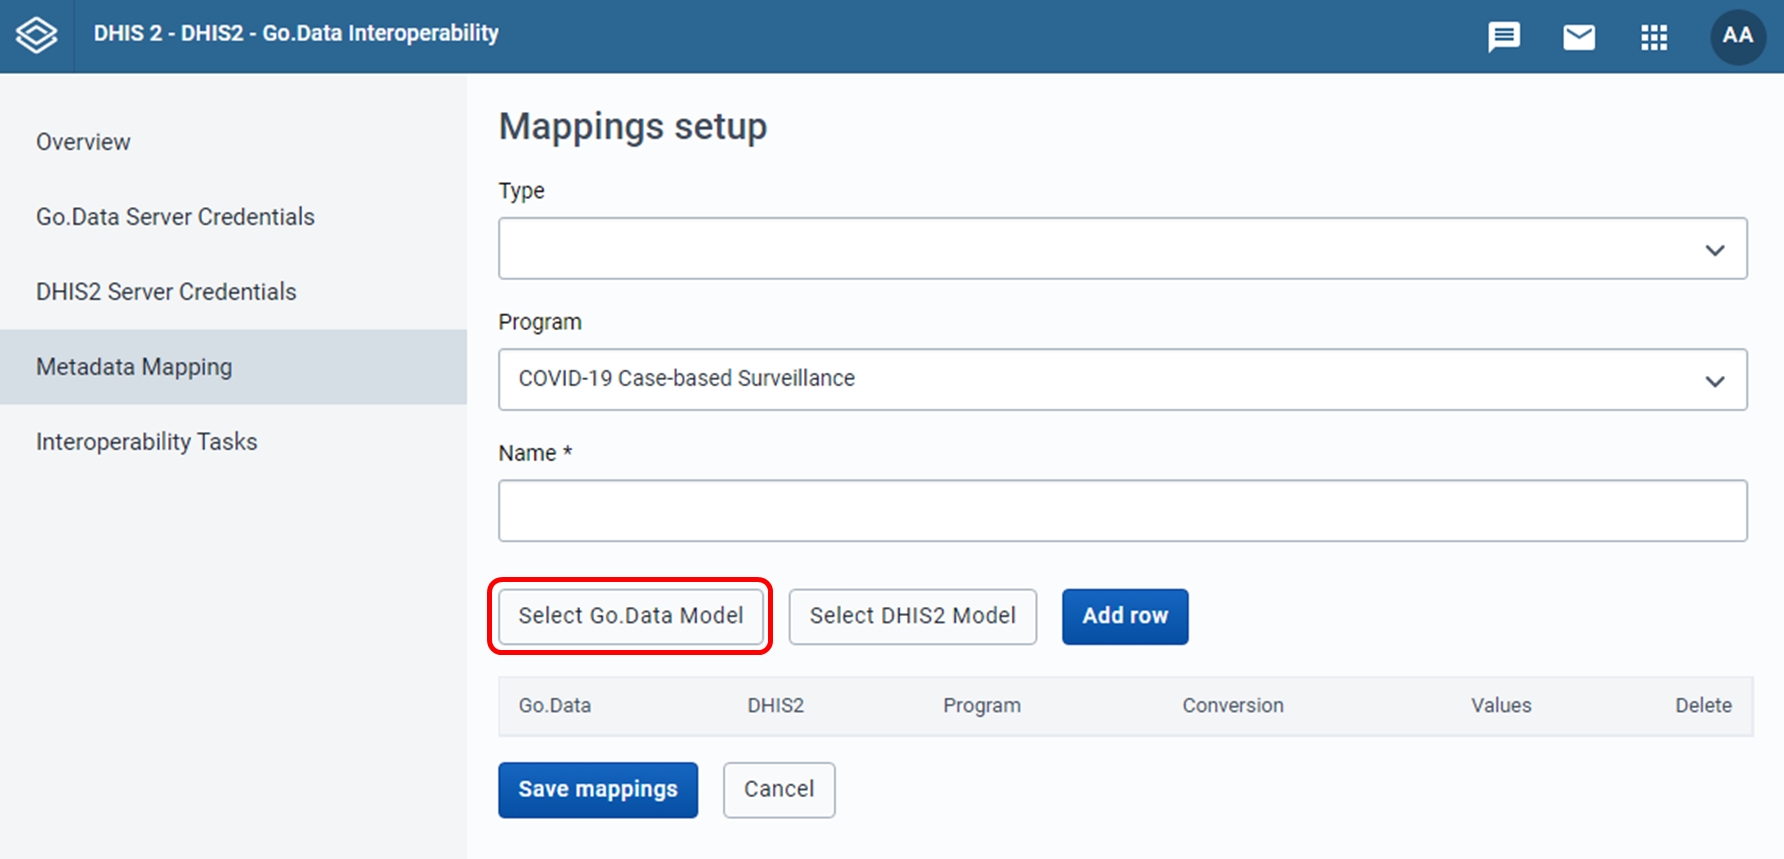
To do so, we need to click on the "Select Go.Data Model" button of the Metadata Mapping we are working on.
This will open a pop-up with a text box. If your Go.Data instance is version 2.40 or higher as recommended, you can automatically fetch the Go.Data model by clicking on the "Autogenerate model" button.
If your Go.Data instance is 2.39 or lower you can still manually find the model and copy it into the text box. However, it is adviced to upgrade Go.Data to 2.40 or above. To do so, you will need to browse the API explorer of your Go.Data instance (by typing "/explorer" after your Go.Data instance's URL), find the type of mapping that you are creating (remember: outbreak, location, case, etc.) and click on it. This expands the explorer with a set of elements: you'll need to open the generic element's POST operation, click on it, and copy the contents of the light yellow box containing the Model with example values. This is what you need to paste back into the interoperability app text box. After this, you need to click submit to close the pop-up and save the Go.Data model.
DHIS2 model - Optional
Optionally, we can also introduce a custom DHIS2 model by clicking on the "Select DHIS2 Model" button. This option is there just to guarantee maximum flexibility. It allows us to introduce some custom DHIS2 variable names to select from in case we needed to select something that was not present among the data elements, attributes, and program properties of our program.
Last updated